

Coal conveyor lines leak a little after the gate shuts. Fine material gets past the seal, downstream side, right after closure. Most of the time it’s nothing — a bit of ash or pulverized coal sitting between the plate and the seat, gone by the next cycle. Sometimes it’s a groove worn into the sealing face, and that doesn’t go away on its own. Same symptom at first glance. Very different bill at the end.
Contact Is the Whole Point, and the Whole Problem
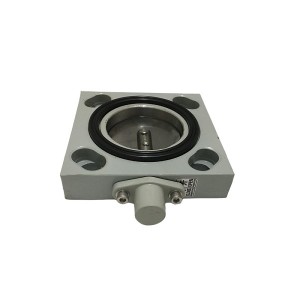
A slide gate valve shuts by pushing a flat plate across the bore, squeezing it against a seat on either side. Nothing rotates. The plate and seat sit against the flowing medium the entire time the valve is open, not just at the instant of closing. Dust, ash, coal fines — all of it passes right across the sealing faces on every cycle. Given enough passes, something eventually gets caught between the two surfaces when they close. That’s not a defect. That’s just how this valve type works in dusty service.
What Happens on This Type of Line
This valve typically sits at a transfer point or discharge chute on a coal conveyor, worked by hand. Closure needs to hold reasonably well, since equipment or storage downstream counts on flow actually stopping. Some seepage past a manual slide gate in dusty duty isn’t unusual on its own. What matters is whether that seepage stays put or climbs.
Why the Inspection Often Comes Back Clean
Someone notices leakage. Opens the valve to look. Sealing face looks fine, no scratch visible. That doesn’t mean nothing was wrong — taking the valve apart can knock loose the exact particle that caused the leak in the first place. The evidence walks off during disassembly, and the inspector ends up staring at a clean surface that was never the actual problem.
Grit Clears. A Groove Stays.
A stray particle wedged between plate and seat blocks full contact at one spot. Leak shows up. Run the valve through a few cycles and the particle can shift, drop away, or get crushed flat. Leak stops, nothing changed on the surface itself.
A groove works differently. Hard particulate, squeezed under closing force, can cut a shallow channel into the softer face. Once that channel exists, cycling does nothing for it. The leak sticks around, and it tends to get slightly worse over time as more fines find that same low spot and wear it a little deeper each pass.
Two explanations, one symptom, opposite outcomes if left alone.
The Cost Trap on Either Side
Full teardown answers the question, eventually, but it’s slow, and it isn’t even fully reliable given how easily a trapped particle disappears during disassembly. Replace the kit on every reported leak and the parts bill runs way ahead of what’s actually needed — minor leaks aren’t rare on a busy coal line. Assume grit every time instead, and a real groove keeps running, keeps leaking a bit more with each pass, and can eventually start eroding the valve body around the seat.
Checking Without Taking It Apart
A few things can be watched without full disassembly.
Cycle the valve a handful of times right when the leak is noticed, and just watch. A leak that shrinks or disappears after a few open-close cycles fits a trapped particle clearing itself out. A leak that holds steady, or creeps up slightly with each cycle, fits a groove instead — cycling isn’t clearing anything, just running more fines across an existing low spot.
Where pressure differential can be monitored after closure, the rate it changes tells a similar story with more precision. A particle-driven leak tends to behave inconsistently across separate closures — tighter one time, looser the next, depending on whether debris happens to be sitting in the way that particular time. A groove-driven leak tends to repeat itself closely each time, because the physical channel causing it doesn’t move. That repeatability is itself a useful clue.
Tracking leak rate over several days, rather than judging off one look, separates a passing contamination event from something that’s actually developing. A leak with no clear pattern, coming and going, points toward grit. A leak that climbs steadily, even slowly, is harder to explain without some real, progressive wear on the surface.
Where it’s possible to tell, checking whether the leak lines up with the same closure position every time is worth doing too. A groove leaks from the same fixed spot, every closure. A trapped particle can shift the leak slightly from one closure to the next, since debris doesn’t always land in exactly the same place.
The Limits of Watching From Outside
None of this proves surface condition with certainty. A pressure trend is a strong hint, not a photograph of a groove. A leak that clears after cycling is a good sign, but a very shallow scratch could, in theory, still show some cycle-to-cycle variation if grit happens to be present at the same time too. These field checks narrow down which story is more likely. They don’t replace an actual look at the surface whenever the valve happens to come apart for other maintenance reasons.
A Working Decision Rule
Rather than deciding replace-or-not off a single inspection, give it a short observation window. Cycle the valve a handful of times as soon as leakage shows up, and watch what happens over the following days, not just the next few minutes. If the leak clears and stays cleared, replacement can reasonably wait. If it holds steady or creeps upward, plan for the kit before erosion starts on the valve body — even without ever having actually seen a scratch.
Keeping Track Over Time
A simple log of leak events — date, rough severity, whether cycling was tried, what happened after — makes the next decision easier and less dependent on memory or guesswork. Full inspection during a scheduled outage, even with no active complaint, catches early scratching before it turns into a recurring leak. Where the material being handled runs more abrasive than usual, shortening the inspection interval is worth considering on its own, independent of any recent leak reports.
Specifying the Kit
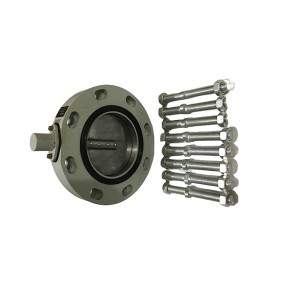
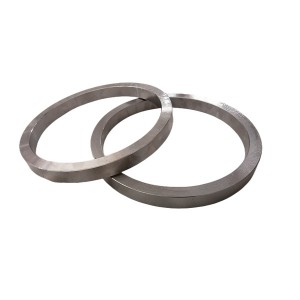
Match the kit to the exact size and pressure class — 200×200 PN1.0 here — since seat and plate dimensions differ between manufacturers even at the same nominal size. Confirm the sealing surface material holds up against the actual particulate in service, since coal ash and pulverized coal vary a fair amount in hardness depending on the source. Confirm whether the kit covers both plate and seat, or seat only — replacing just one half can leave a mismatched wear pattern that shortens the life of whatever’s new.
Last Word
A leak after closure doesn’t come labeled grit or groove. Both look identical the moment someone spots fine material getting through. A few cycles and a bit of patience, watching what the leak does over the next few days rather than the next few minutes, is a cheap way to start telling them apart — and it gives something more solid to base a replacement decision on than a guess made from one clean-looking inspection.
Post time: Sep-11-2026
-

Cellulose filter element DP903EA10V/-W for stea...
-

LVDT Transmitter LTM-6A
-

CWY-DO Steam Turbine Eddy Current Sensor
-

Epoxy Phenolic Anti-Corona Laminated Glass Clot...
-

Hydraulic Pressure Control Valve PCV-03/0560
-

188 generator rotor surface red insulating varnish
-

Motor slip ring carbon brush J204 series
-

LVDT displacement Sensor 2000TD
-

Magnetic reed switch (sensor) CS1-F
-

Sealing Oil Differential Pressure Valve KC50P-97
-

Vibration speed Sensor HD-ST-A3-B3
-

LX-FF14020041XR Compressor air filter element